When last we left our intrepid hero, he was inspired by all the rain to figure out how to capture the raindrops as they hit surfaces. He had built an extension cable and housing for his flash… all he needed was rain. Which had apparently abandoned him.

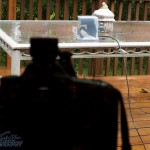
Yesterday, that changed. Big storms came through Da Lou, and put raindrop photography back to head of the photographic class. As you can see in the photo, I deployed my flash in its nifty new housing atop my target table. My thinking was that the water would pool on the table, and with the shallow depth, the drop splashes could be pretty impressive.
And the rain fell, and fell, and fell. It was a great storm to practice on, with varying amounts of rainfall to experiment with. For most of the shots, I was using my flash on “multi” mode — stroboscopic — at 199hz (199 flashes/second) and 1/128th power. I did this to capture the droplets as they splashed about, and to keep the stress on the flash down.
Lessons learned? Well there were a few:
- Power for the flash. Replacing batteries pretty frequently really sucked. Not only was I missing shots, but as the batteries drained, the recycle times got longer and longer. Obviously, I need to find an AC power source for the flash.
- Controlling the droplets. Let’s face it. The rain falls where the rain falls. Predicting that is very tough, so figuring out where to focus is a mess. I had the camera stopped down in order to get a pretty wide depth of field, but that made every single splatter show up, and in some images, it’s hard to figure out what I really wanted the viewer to focus on. I need to find a way of directing the droplets where I want them, at the pace I’d like (in order words, not a vertical river like a downspout gives you) so I can increase my odds of getting decent images.
- Snoot. The enclosure does a great job of diffusing the flash, lighting up a lot of splatters, and while that’s great for some of the images, for others, it would’ve been nicer to have a focused source of light. A snoot woulda done that, but I’m not entirely sure how I’d manage that with the waterproof housing. Perhaps it could velcro to the outside? Since the snoot would likely be plastic, it probably doesn’t matter much if it gets wet.
- Spray and pray. As I mentioned above, rain falls on its own schedule and location. This means that I trigger the shutter endlessly, hoping for the best shot to appear in the frame. Ideally, controlling the location of the falling droplets would be great, but barring that, having some way of triggering the camera only when a droplet hits the area of interest would be great. There are ways to do this, but that’s gonna mean more DIY work!
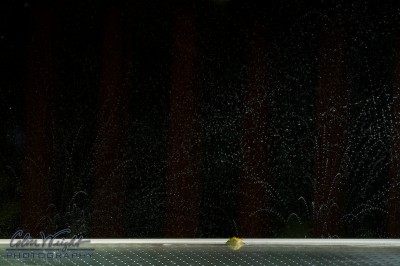
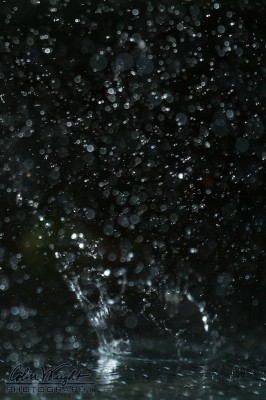
With all that said, enjoy some of the fruits of about 500 images shot, culled down to 100 or so that were “of interest”, and further culled down to just a few that were pretty dang cool right out of the camera (and a little cropping in Aperture). As you can tell by looking at the images, there are some surprises out there. Big splashes, droplets that shimmer in the stroboscopic light like fireworks in the night sky, and all kinds of minutiae that you’d never see without the aid of the camera. Enjoy!


Love, love, love the 3rd one down the best. But all are amazing. I’ll never be that good….or lucky, as the case may be.