Category Archives: Geek-Speak

Geeky spaces lie within — be careful where you step!

Apple MacPro, OS X Yosemite and Wi-Fi … The Honeymoon’s Over

OK, so I’ll admit it.  I’m an Apple fanboy, and have been since making the switch to Macs in 2005.  For geek profile purposes, I would tell ya that I’m an early adopter, and a realist about problems that may show up.  It’s hardware, and software, and even though there’s tight synergy granted from both sides of that coming from the same complex in Cupertino, I recognize that things will go bump every now and then.

That said, let me introduce you to my latest saga with the Apple ecosystem.

AirDrop is a pretty cool technology that allows Macs, and now iPhones with iOS 8, to create short-lived, ad hoc networks to transfer files.  This is pretty cool, especially if you use your iPhone as a primary form of photography (And for Rick and Tom, I’m not naming names here!), and for probably other uses as well.  Once I got both Yosemite and iOS 8.1 down, I wanted to give AirDrop a try.  The first prompt I got was to turn on the wi-fi card in my late-2013 Mac Pro cylinder.

As a note, I don’t usually keep wi-fi enabled on my Mac Pro.  This machine never travels, and does some big data moves across my network, so hardwiring it at gig-e speeds just makes sense for me.

When I tried to turn on the wi-fi on my shiny cylinder o’ fun, I clicked the button on the network preferences panel… and nothing happened.  I clicked it again.  Nothing.  And like any good techie, I continued clicking it periodically over the next few minutes.  Nada.

I decided to restart my Mac, and as though by magic, I was able to turn on wi-fi in my system.  I played with AirDrop, and then turned off wi-fi.

Fast forward to yesterday.  I took a walk at lunch.  Normally, I use a Garmin Forerunner 310XT to capture my travels, but for some reason, it was having trouble finding the satellites, so I did my walk, and then wanted to check the distance.  My go-to answer for years has been Google Maps, but I figured that since Apple had included this cool Maps application on the desktop, I’d use it.

Well… it barked about not being able to find my position without wi-fi being turned on, which means the app barks incessantly about how it can’t determine my location.  I even tried to feed it my location to shut it up, and it still was pretty dang insistent.  I know my Mac doesn’t have a GPS device embedded in it, so it’s obviously using my wi-fi network name to figure where I am, based on the network I’m connected to.  If I’m out in public, that’s pretty cool.  Sitting in my house, that’s a little creepy.  TMI, say I!  However, that misgiving aside, I turned on my wi-fi.

Or tried to.

Once again, I was left with a wi-fi system that didn’t seem to be active, regardless of what I’d do.  Once again, I restarted my machine.  I paid close attention this time, and noticed that the wi-fi was on when the machine came back up.  Whether I had hit the button an odd number of times, resulting in the post-reboot status being active, or if it just remembered that I was trying to turn it on, my cylindrical Mac came back up with wi-fi happy.  Oh, and Maps was much happier as well.

So, what’s this mean?  I’m not entirely sure.  Except that I need to be planful around when I want to use AirDrop or Maps, or anything else requiring the lil’ Mac Pro to have its wi-fi enabled.

I’ve done a ton of searches on this issue.  Unfortunately, there are loads of as-yet-unresolved issues with Yosemite around wi-fi performance and dropping networks, and those are clouding my searches with a lot of wild goose chases.  If I had to guess, I’d bet that something is being flagged to turn on wi-fi, but can’t complete until after a restart for some reason.  Or, wi-fi is really active, but all the indicators in the network preferences aren’t there. I should probably watch my Apple network gear (using my iPad or iPhone) to see if there’s every anything showing up on the router’s side, which could help narrow things down.

Just a little spot on my otherwise shiny Apple!

Apple iPhone 6 Plus

As I mentioned a few weeks ago, I decided to get an Apple iPhone 6 Plus. It’s arrived, and here’s some of my thoughts.  (Granted, there’s probably nothing earth-shatteringly new here, but sometimes, ya just gotta say stuff.)

First off, the device is big. Really big, and that’s something that’s probably important to some people. For me, the way I use my phone is more as an Internet terminal rather than a phone, so the larger size is not all that important. When I need to use my phone as a phone, I’m usually using it with the speaker phone function turned on, so that mammoth physical size is really not that big an issue.

And frankly, while the width and height are generous, the thing is really slim, and doesn’t seem to weigh a ton.  And yes, it does fit in your pocket nicely … at least in my jeans.  If you’re a painted-on skinny jeans person, first off, I’m jealous, and secondly, it probably ain’t gonna fit in your pocket nearly as well as me in my baggy 550’s.

I love the rounded corners.  I tend to vacillate on this quite a bit.  When the iPhone 5 came out, I wasn’t a huge fan of the sharp edges, but I grew to like ’em.  Now, the smooth contours of the iPhone 6 Plus have really seduced me.  It feels slick, curvaceous, and well molded for your hand.  I did buy a case (Spigen Thin Fit A), and while the case nicely fits the phone, and feels very protective, I really like the feel of the phone without it.  This case is small enough (but still sturdy!) that if you didn’t know the phone had a case on it, you might mistake it for part of the phone.  I’ve run with my phones both naked and covered, and this might be a phone that is prone to running around naked.  It’s just that nice.

iPhone 5 and iPhone 6 Plus

The new screen is gorgeous.  It’s full 1080, and watching HD video on it is a dream.  Star Trek: Into Darkness is my favorite film to show off the crisp new display.  It just rocks on this device.  Really, really sharp, clear images from a well-done HD film.

One of the factors that drove me to this model over the regular iPhone 6 was the optical image stabilization in the camera.  On paper, this sounds like a really good thing.  In practice, I’ve only shot once where I was rocking’ and rollin’ (in the Jeep, handheld, going over some rocks), and it seemed to make a difference.  That’s not very scientific though, and is something I should try in a little more controlled environment against something like a GoPro, that doesn’t have IS.

Battery life seems to be much nicer than my iPhone 5.  I’ve found that the Facebook really drained the battery on my iPhone 5, and that seems better with the iPhone 6 (and that was with running the new iOS on both phones).  On the iPhone 5, I’d drain out to about 30% across a day of normal usage (including Facebook).  On the iPhone 6 Plus, I might drain down to 70% or so across the day.

And I really like TouchId.  Being able to identify my via the “belly button” is awesome.  I love not having to key in a passcode to unlock, and now having some applications using that as authentication within the application just makes it more magical.  Very, very cool!

Now for the ugly… The buttons.

The case redesign moved the volume and power switch, and I’m just not a fan of where they landed.  I like the fact that the power button isn’t on top, but my muscle memory always goes to the right side of the phone for volume, and that’s where the power button was relocated.  So when I try to change volume when listening to music, I turn off the iPhone.  Boo.  It’s just retraining, and I get that, but for someone that relies on knowing how to use his tools without looking, I don’t like changes to where controls are.  That’s one of the reasons that I tend to stick with the same brand on my toys — Canon cameras, Taylor guitars, etc. — so there’s not much (if any) retraining of my old brain.  I’m sure there’s a reason the volume control was moved, but I think you could move the power switch without relocating the volume control too.

One more thing I’d mention is the camera lens.  I really don’t like that the lens protrudes beyond the back case.  I don’t think you could hurt it, but that’s another great reason to have a case on the thing.  It’ll definitely keep it flat on a table.

So… a whole lot of goodness, and just those silly button relocations as a negative for me.  YMMV!


Once Again, Into the Fray

Last week, Apple announced the new iPhone 6 models and the Apple Watch.  Since the Apple Watch doesn’t ship until next year, I went ahead and ordered the iPhone 6.  🙂

We’ve been with Verizon for the last two years, and it’s been a good relationship.  Unfortunately, Darla and I came into our iPhone purchases a little late, so we weren’t eligible until early October to order new phones, and I had resigned myself to a new iPhone arriving sometime in November.  Until today.

Upgrade Time!One of my coworkers clued me in that Verizon had changed the eligibility for some folks, so I called #874, and waited for the return text message…  Success!

With that, I pounced on ordering my new phone.  I skip every other version, so my iPhone 5 was starting to look a little long in the tooth.  I had a smaller memory model, expecting to leverage the cloud for my files, and while I’ve done that, I also like having my stuff with me.

With the announcement last week, folks have been asking me what model I was going to order.  Frankly, it was a pretty easy decision for me.  I use my iPhone more as a internet terminal than a phone most of the time.  And when I am using it as a phone, it’s either Bluetooth tethered to the Jeep, or on speakerphone mode.  I rarely hold it to my head.

With all that in mind, true 1080 HD resolution, and optical camera stabilization, it was easy to fall in line behind the iPhone 6 Plus.  Capacity was another question though.  For years, I’d bought the largest amount of storage I could get on my Apple i-devices.  In my last round of purchases, I’d opted for a smaller memory footprint, and leverage stuff in the cloud.  However, after two years of working within a small footprint, I’ve decided bigger is better, and opted for a 128GB device.  And if you’re keeping score at home, I ordered a Space Gray.

With all that said, the target delivery date range is October 16th – 23rd.  Had I ordered on October 3rd, it really would’ve been November!

I’m looking forward to playing with the new camera more than anything else.  I’ve always been impressed with the ubiquity of my iPhone, and it’s been my “best camera” because it’s the one that’s with me.  With the camera improvements, I expect that’ll get even more use from me.  And with the larger storage, I’m betting I’ll use it as much as my other camera rigs.

So watch this space — a month from now! — and we’ll see just what the iPhone 6 Plus brings to my world!

NDD: Logitech FabricSkin Keyboard Folio

(NDD is New Doodad Day, btw…)

Another day, another new toy. Today’s is the Logitech FabricSkin Keyboard Folio.

I’ve been thinking more and more about a keyboard for my iPad, and starting to use it more as a mobile communication device, rather than just as an internet consumption device, which has been my primary use for it. Enter the desire for a keyboard. (Note that I didn’t say need!)

Plug it in (to charge it), insert the iPad into the pretty dang secure holder, and it was ready to pair with my iPad. From unviolated box to paired and typing in about 90 seconds. Pretty cool.

I will mention that the keyboard has a funky feel. It’s a covered, slightly membrane-like keyboard, so the keys have a little funkiness to their feel, both from the fabric and from the short throw action. However, it’s definitely better than typing on the glass, and I’m noticing just through typing this up, I’m getting used to the feel a bit.

More to come, I’m sure, as I play with this gadget on a more regular basis!

There’s No Card Up My Sleeve!

CF Cards
Pick a Card!

With a trip to Florida looming (more on that another time), and finally converging my world onto a new MacBook Pro (more on that another time also), I figured I would do a little prep work for the trip.

For most people, that would mean figuring out what to visit, what to pack, and other trip details. For me, that means speed tests of CompactFlash cards.

(Yeah, I wear my geek on my sleeve.)

So here’s the deal. I have a Lexar USB 2.0 card reader that’s served me well for years. And within the last year or so, I invested in a couple of pretty dang speedy Transcend 16GB 600x CompactFlash cards. I wanted more capacity, and found these cards on sale for cheap a while back.

Well, with the new laptop, I now have access to USB 3.0 ports, so I picked up a Lexar USB 3.0 card reader. It basically looks the same as the USB 2.0 version, with the exception of the plug difference, distinguishing it as a USB 3.0 device.

While in Florida, I want to shoot some long time lapse series of star trails over the water, and I knew I’d need more capacity for that if I was going to shoot those with my 7D. That led me to look at high capacity cards. I’d been pleased with the other Transcend cards, so I looked to them again. I figured I would shoot for a 64GB card this time, with a thought toward 10-14 hours of shooting at night.

The Transcend 600x card was about $200, with the 400x card being about $100. I didn’t need speed for shooting, but having speed for pulling the images off the card was pretty key. Reluctantly, I went with the 400x card. Doubling the price for a little faster card was something I just couldn’t justify.

Little did I know that I made a great decision.

That’s the backstory. Here’s what I found, when transferring just about 4GB of video files from the cards to the SSD in my MacBook Pro.

USB 3.0 USB 2.0
SanDisk Ultra II 8GB *** 5′ 39″
SanDisk Extreme III 16GB 1′ 29″ 2′ 02″
Transcend 600x 16GB 0′ 47″ 1′ 45″
Transcend 400x 64GB 0′ 31″ 1′ 42″

Yeah, you read that right. The 400x card is faster than the 600x card, which was quite unexpected. Here’s my theory.

I know the 400x card is UDMA 7. The newer editions of the Transcend 600x cards say they’re UDMA 7, but my slightly older ones don’t. I suspect they are likely UDMA 6, and that’s probably why they’re slower. At USB 3.0 interface speeds, there’s not a ton of difference in the times with 4GB of data aboard.

4GB transferred in about 30 seconds. That’s simply amazing. I can remember copying data to/from 5.25″ floppies — 360KB each — and it taking f-o-r-e-v-e-r to move data around. 4GB is something like 11,000 of those floppies, and I can’t imagine how long it would take to move data off those. Of course, I only had a 40 *megabyte* Seagate harddrive at the time, so it would’ve been moot to try it anyway.

How’s that for some vacation planning? 🙂

Convergence

For a long, long time, I’ve wanted to get my digital life in one place, while still having the power to do what I want.  Oh, and I wanted to be able to carry it everywhere — inside the house, to work, on vacation.

Yeah, I just want everything.  Doable, yes?  Well, not really… until now.

I’ve tried to put everything in one place, and force all my work into one device.  That was with an old MacBook Pro.  I was landlocked at 6GB of RAM, which wasn’t enough to handle my work, and once I started talking about 100,000 images, that pushed me to external drives, which killed my throughput.  Add to that a spinning harddrive inside the laptop, and it wasn’t quite as portable as I’d like.

For power, I moved through an eight-core MacPro, and eventually landed on an eight-core iMac.  That iMac has been great, although the speed for external drives hasn’t been terrific, with Firewire 800 being as fast as it goes.

When the MacBook Airs hit, I picked up one, and it’s been a great “on the go” machine, but definitely not the power nor speed for external storage that I’d like.  Still, it’s a nice machine.

Enter the new MacBook Pro with Retina Display.

This little box seems to have it all.  Internal solid state drive — quick boot, and safe to move the machine quickly, like the MacBook Air.  For external drives, there’s USB 3.0 and Thunderbolt connectors, which are both way faster than Firewire 800 or USB 2.0.  Processor-wise, it’s an eight-core beast with plenty of speed.  It can be custom-built with 16GB of RAM, which is as much as I had on the iMac and is more than enough for my needs.

And then there’s the screen.

I took a look at one at the Apple Store, and was just gobsmacked.  It’s the most amazing screen I’ve seen on a laptop.  The 15″ screen has more pixels than my 27″ iMac had.  And stunning, stunning color.

Notice all the past tense references?  Well, that’s ’cause I’ve drunk the Kool-Aid, and have one of these beauties on order.  Unfortunately, delivery is gonna take a month.  Apparently, they’re flying off the shelves, and Apple can’t make them fast enough.  If you’re Apple, that’s a great problem to have.

Stay tuned… once the little guy shows up, I’m sure I’ll have some comments about it!!!!

The Lion’s Meow … and Its Teeth!

The shiny new OS for my Macs — “Lion” — was dropped this week. Through a weird quirk of timing, I was able to get it gratis from the Kids at Cupertino. You see, I bought my new MacMini just a few into an as-of-that-time-unannounced window where you could get Lion for free because your machine shoulda shipped with it… or something like that. Anyway, one redemption code in the AppStore later, and Lion was on the MacMini, and was installable on my other two Macs as well. Woohoo!

The first wart I discovered with was Microsoft’s Remote Desktop Client. I had to “Force Quit” the app a few times, and even bounced the machine before it would finally work. I have no idea what it was doing, but it eventually was functional. Yippee!

The next wart was one I knew about — Quicken. Quicken 2007 for the Mac was a PPC-only app, and with the dropping of Rosetta, PPC apps aren’t supported. Makes sense — it’s been almost six years since the Apple switch to Intel. So one quick online purchase later, and Quicken Essentials — the only version available for the Mac — was on the iMac and purring along. Hooray!

Today, I went on a quest to see what other PPC-only pieces of code I had out there. Surprisingly, there were some. There was The Sims, which I really hadn’t played since I installed it. I evicted ’em.

And then I noticed a bad one: EyeOne.

I bought my EyeOne at DLWS in the fall of 2005 for use in profiling my monitors. It’s a cool tool, and code has been carried along for quite a while, with no big changes. That means the functionality didn’t change, which is good, but with the advent of Lion, the old PPC codebase simply won’t fly. From what I’ve been able to see here and there on the ever-truthful internet, it appears that the new owners of the codebase don’t seem to be real interested in updating the code for us loyal EyeOne users. Bummer. That probably means that a new profiling package is in my future. I had to have to do that, but I don’t know any way around it.

With all that in mind, the upgrade to Lion has cost me $50 for Quicken, and who-knows-how-much for a new profiler … maybe a few hundred bucks?

As for functionality, Lion has a few new things, a redesigned Mail application, and some pretty visual changes that are pleasant to watch. Are there gobs of new things I see as I use my machine for scanning, Aperture, or other things? Not really. I do hate the fact the scrolling is now backwards — now, you “push” or “pull” the content in the direction you want, kinda like a physical piece of paper. Definitely backwards, and makes my transition from work (Windows-centric) to home (Mac-centric). I know you can change that behavior, but if that’s the way Apple’s headed, I kinda wanna go that way too, lest I get caught later needing to learn this new behavior, but under some pressure to get something done!

So for me, Lion’s less of a big cat, and more of kitten. Like with any kitten though, it’s inflicted a little pain that I’m just gonna have to figure out how to heal.

CORRECTION/ADDITION : It appears that X-Rite (who now owns the codebase for the EyeOne) are planning to include support for my device in a new piece of code to be released in September. Of course, it won’t be a free upgrade, and I will have to live without my profiler for a few months. Color me hopeful that this gets resolved both quickly and correctly!

Photographing Raindrops (Part 2)

When last we left our intrepid hero, he was inspired by all the rain to figure out how to capture the raindrops as they hit surfaces. He had built an extension cable and housing for his flash… all he needed was rain. Which had apparently abandoned him.

The Setup
The Setup

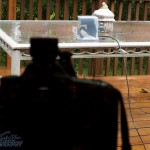
Yesterday, that changed. Big storms came through Da Lou, and put raindrop photography back to head of the photographic class. As you can see in the photo, I deployed my flash in its nifty new housing atop my target table. My thinking was that the water would pool on the table, and with the shallow depth, the drop splashes could be pretty impressive.

And the rain fell, and fell, and fell. It was a great storm to practice on, with varying amounts of rainfall to experiment with. For most of the shots, I was using my flash on “multi” mode — stroboscopic — at 199hz (199 flashes/second) and 1/128th power. I did this to capture the droplets as they splashed about, and to keep the stress on the flash down.

Lessons learned? Well there were a few:

  • Power for the flash. Replacing batteries pretty frequently really sucked. Not only was I missing shots, but as the batteries drained, the recycle times got longer and longer. Obviously, I need to find an AC power source for the flash.
  • Controlling the droplets. Let’s face it. The rain falls where the rain falls. Predicting that is very tough, so figuring out where to focus is a mess. I had the camera stopped down in order to get a pretty wide depth of field, but that made every single splatter show up, and in some images, it’s hard to figure out what I really wanted the viewer to focus on. I need to find a way of directing the droplets where I want them, at the pace I’d like (in order words, not a vertical river like a downspout gives you) so I can increase my odds of getting decent images.
  • Snoot. The enclosure does a great job of diffusing the flash, lighting up a lot of splatters, and while that’s great for some of the images, for others, it would’ve been nicer to have a focused source of light. A snoot woulda done that, but I’m not entirely sure how I’d manage that with the waterproof housing. Perhaps it could velcro to the outside? Since the snoot would likely be plastic, it probably doesn’t matter much if it gets wet.
  • Spray and pray. As I mentioned above, rain falls on its own schedule and location. This means that I trigger the shutter endlessly, hoping for the best shot to appear in the frame. Ideally, controlling the location of the falling droplets would be great, but barring that, having some way of triggering the camera only when a droplet hits the area of interest would be great. There are ways to do this, but that’s gonna mean more DIY work!

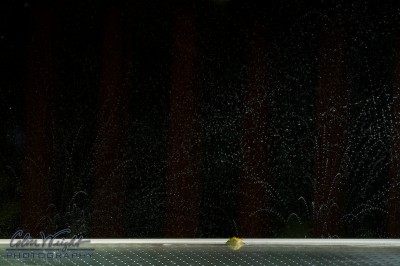
With all that said, enjoy some of the fruits of about 500 images shot, culled down to 100 or so that were “of interest”, and further culled down to just a few that were pretty dang cool right out of the camera (and a little cropping in Aperture). As you can tell by looking at the images, there are some surprises out there. Big splashes, droplets that shimmer in the stroboscopic light like fireworks in the night sky, and all kinds of minutiae that you’d never see without the aid of the camera. Enjoy!


Photographing Raindrops (Part 1)

Saturday morning, we had some big ol’ storms come through Da Lou. They woke me around 5am, and with the house quiet with sleep, I decided to shoot some raindrops from the storm.

I found that the rain was moderating as I was setting up, and by the time I was ready, we were down to drips of rain. Still, it was a good opportunity to play. Now, the sky was really dark due to the clouds still over us, and that drove me to crank the ISO up on the shots. The Canon EOS 7D can make some acceptable images at high ISO, but with pretty dark conditions already, and a need to have a decently deep depth of field… well, my images weren’t quite where I wanted ’em to be.

So, I started thinking about flash for the drops. The forecast was for more rain, so I started puzzling out how I might add my Canon 580 EX II flash into the picture. (Pardon the pun.) The more I thought about improving my shots, the more I thought I’d wanna take advantage of the wireless capabilities of this flash when used with my 7D. This would let me put the light where the drops are falling. All good.

My brain sometimes will get just a little too far down the path, and this morning was no exception. I thought, if just a flash was nice, why not use the strobe feature from my flash? That might make for some interesting shots, freezing the action over and over again in the same frame. Well, it was a great idea while it lasted. You see, you can’t use the strobe feature on the 580EX wirelessly. D’oh!

That meant going wired. The only extension cable I had was a curly job, maybe 12-18″ long, and nowhere near long enough for what I needed. You see, I wanted to put the flash outside, and keep the camera inside and dry. (But won’t the flash get wet? I’ll get to that in a bit.)

I looked around the ‘Net, trying to find anything about extending the reach of my hotshoe cable. I found an article at Vu Le Photography that described how to use a pair of wall-mount Cat5 receptacles to extend a hotshoe cable using a simple Cat5 cable. A quick run to Home Depot, along with getting up the guts to cut my not-inexpensive cable in two, and I was ready to go. The instructions were clear, and inside 30 minutes, I had a extendable cable.

I connected the Cat5 cable between the two ends of my previously intact cable, and… it worked! I was able to use the strobe mode on my flash from afar.

Remember I said I was gonna leave my flash out in the rain? I figured I needed to find a container to enclose the flash, keeping it dry, while still having it near the raindrops. I thought about buckets, and other kinds of rainshields. And then I went in the kitchen… One of Becky’s Lock&Lock containers — a tall 1.5L container, perhaps this one — was the perfect size to hold the 580EX, and hold it upright! In fact, I could even put the all the cable connections inside the container. I cut a small notch in the lip to let the Cat5 cable pass through, and on the bench, it all works.

With storms coming tonight and tomorrow, I should have a chance to put it to the test. We’ll see if all the work will pay off!

Stay tuned…

New Gear : MacMini

Yeah, yeah, it’s been two weeks since my Memorial Day missive. (Thanks, BTW, for all the kudos on the piece — biggest “hit” day ever on the blog.) It’s time to get back on the wagon, so we’ll get a little stream o’ consciousness about some of the new toys in the Deauxmayne.

I’ve had a MacMini for years. In fact, my first MacMini was a 1.42GHz G4 MacMini back in 2005. That was a cool little machine — teency, reasonably fast for what it was, and a great infrastructure machine (at the time, I also had a G5 iMac). And, it was my first foray into the weird little stepchild that is the MacMini.

A year later, I upgraded to a 1.66GHz Core Duo MacMini — one that I was still using as an infrastructure machine until the latest acquisition. Again, a cool little machine, with plenty of upgrade potential. Getting the machine open required the use of a cake icing tool (seriously!), and I got inside it several times to upgrade memory and hard drives. In fact, until a year or so ago, it was the “server” this site sat atop.

Enter the recently announced OS X Lion. Looks like it’ll be a great new OS, but it’s hardware bar-to-entry is a little higher than my lil’ ol’ MacMini could provide. So, after five years, it was time to move on to new hardware.

I picked up the new little 2.66GHz Core 2 Duo MacMini last week, and was really impressed with the size. It’s thinner, albeit a bigger square than its predecessor. And along with that thinness, Apple learned a lesson from the AppleTV, and dropped the power brick — a single cable plugs into the back, and that’s it. What a great improvement!

Another nice touch are Mini DisplayPort and HDMI ports on the back for video. No more bulky DVI connector! There’s also a FW800 port, and four USB ports — all good things for the way I’m using the little box. Apple also put an SD card reader in it… but it’s located on the back on of the machine. That’s a really, really, really weird place for a slot that you’d figure someone might be using a lot if this was your primary machine.

So what do I use it for?

Firstly, it’s a print server, serving up my Canon multifunction printer to all the machines on the network. Printing from everywhere is a great thing!

Secondly, it’s a backup machine. Using Chronosync, I backup my recently-acquired Western Digital My Book 4TB array (from the iMac) to a pair of Western Digital My Studio 2TB drives. One gets the photo and scan archive, and the other gets the rest of my digital life — documents, software, etc.

Thirdly, I have a fileshare sitting on it that Becky uses to drop off files for backup. Basically, an internal cloud application from her view. (I had to throw a cloud reference in there!)

Lastly, I have it set up for video import duties. I can import via my EyeTV device, or from my Canon ZR70MC digital camcorder. It’s got a nice A/D import path in it, and with FW800 in the new MacMini, it makes importing video a breeze.

Are there other things I could do with it? Maybe… probably. For now though, I’ve got a pretty cool infrastructure machine that just percolates right along, without me having to worry about it at all. That’s solid, and it just works.